Actonplex
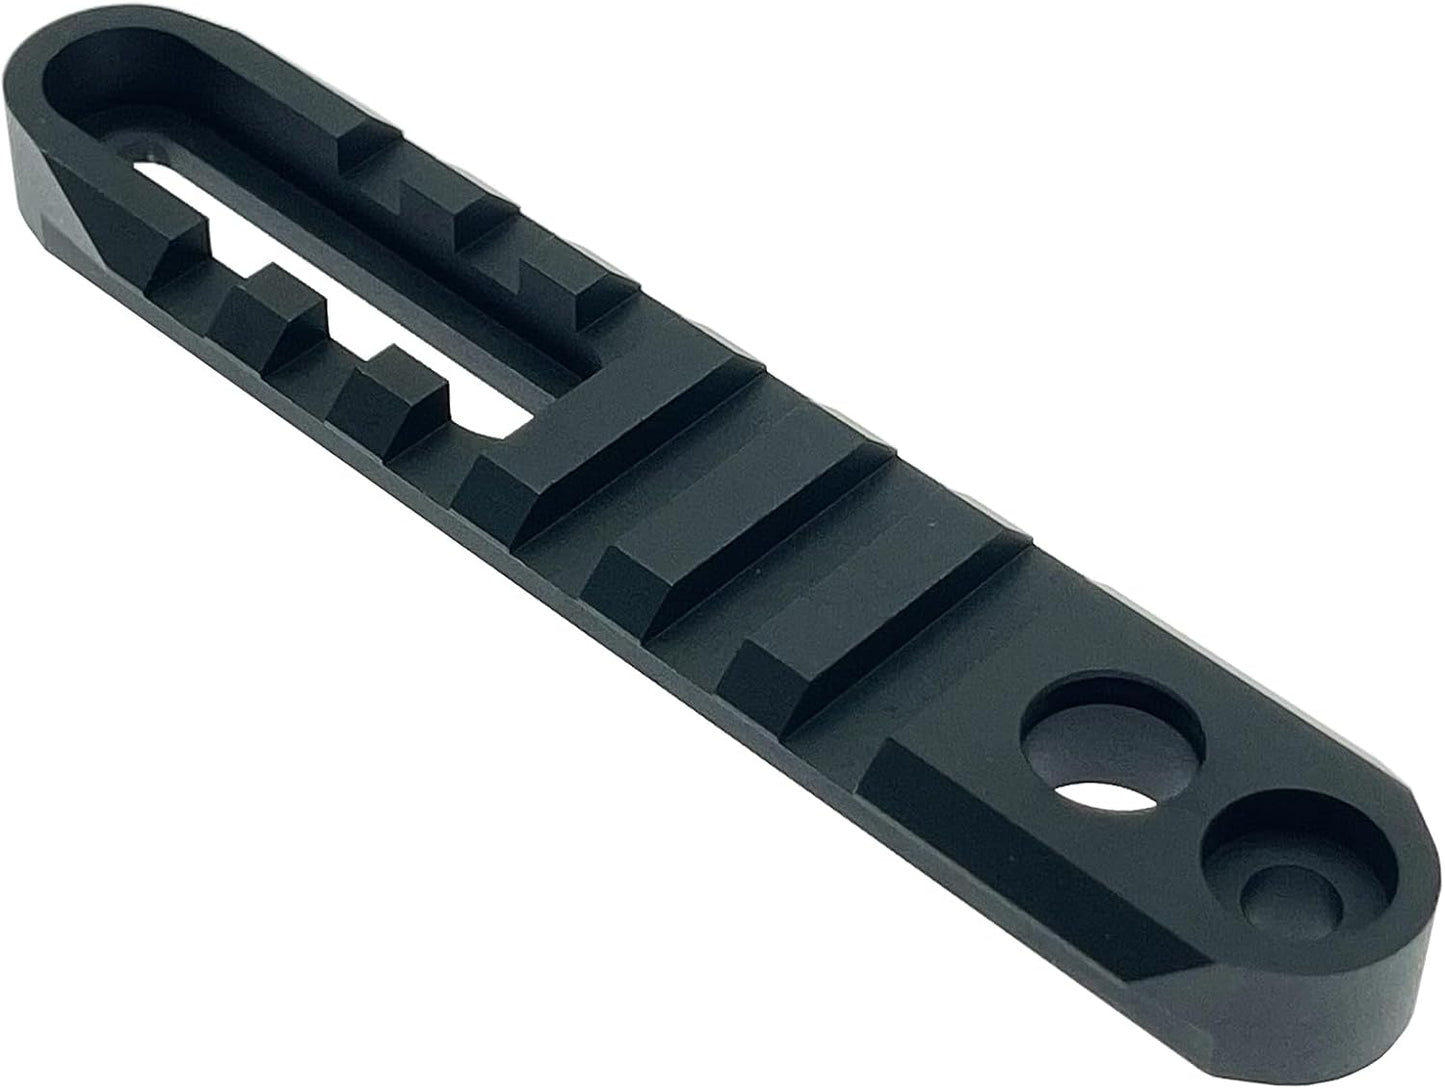
1913 Rails 3.35" and 4" Flush Cup Fit for Atlas BT15 & BT17 Bipod, with Flat Back That Can Be Safely Mounted On Flat Surface, Maded from 6061-T6 Aluminum with Mil-Spec Type III Class 2 Finish
1913 Rails 3.35" and 4" Flush Cup Fit for Atlas BT15 & BT17 Bipod, with Flat Back That Can Be Safely Mounted On Flat Surface, Maded from 6061-T6 Aluminum with Mil-Spec Type III Class 2 Finish
Regular price
$28.95 USD
Regular price
$0.00 USD
Sale price
$28.95 USD
Unit price
per
Tax included.
Shipping calculated at checkout.
Couldn't load pickup availability
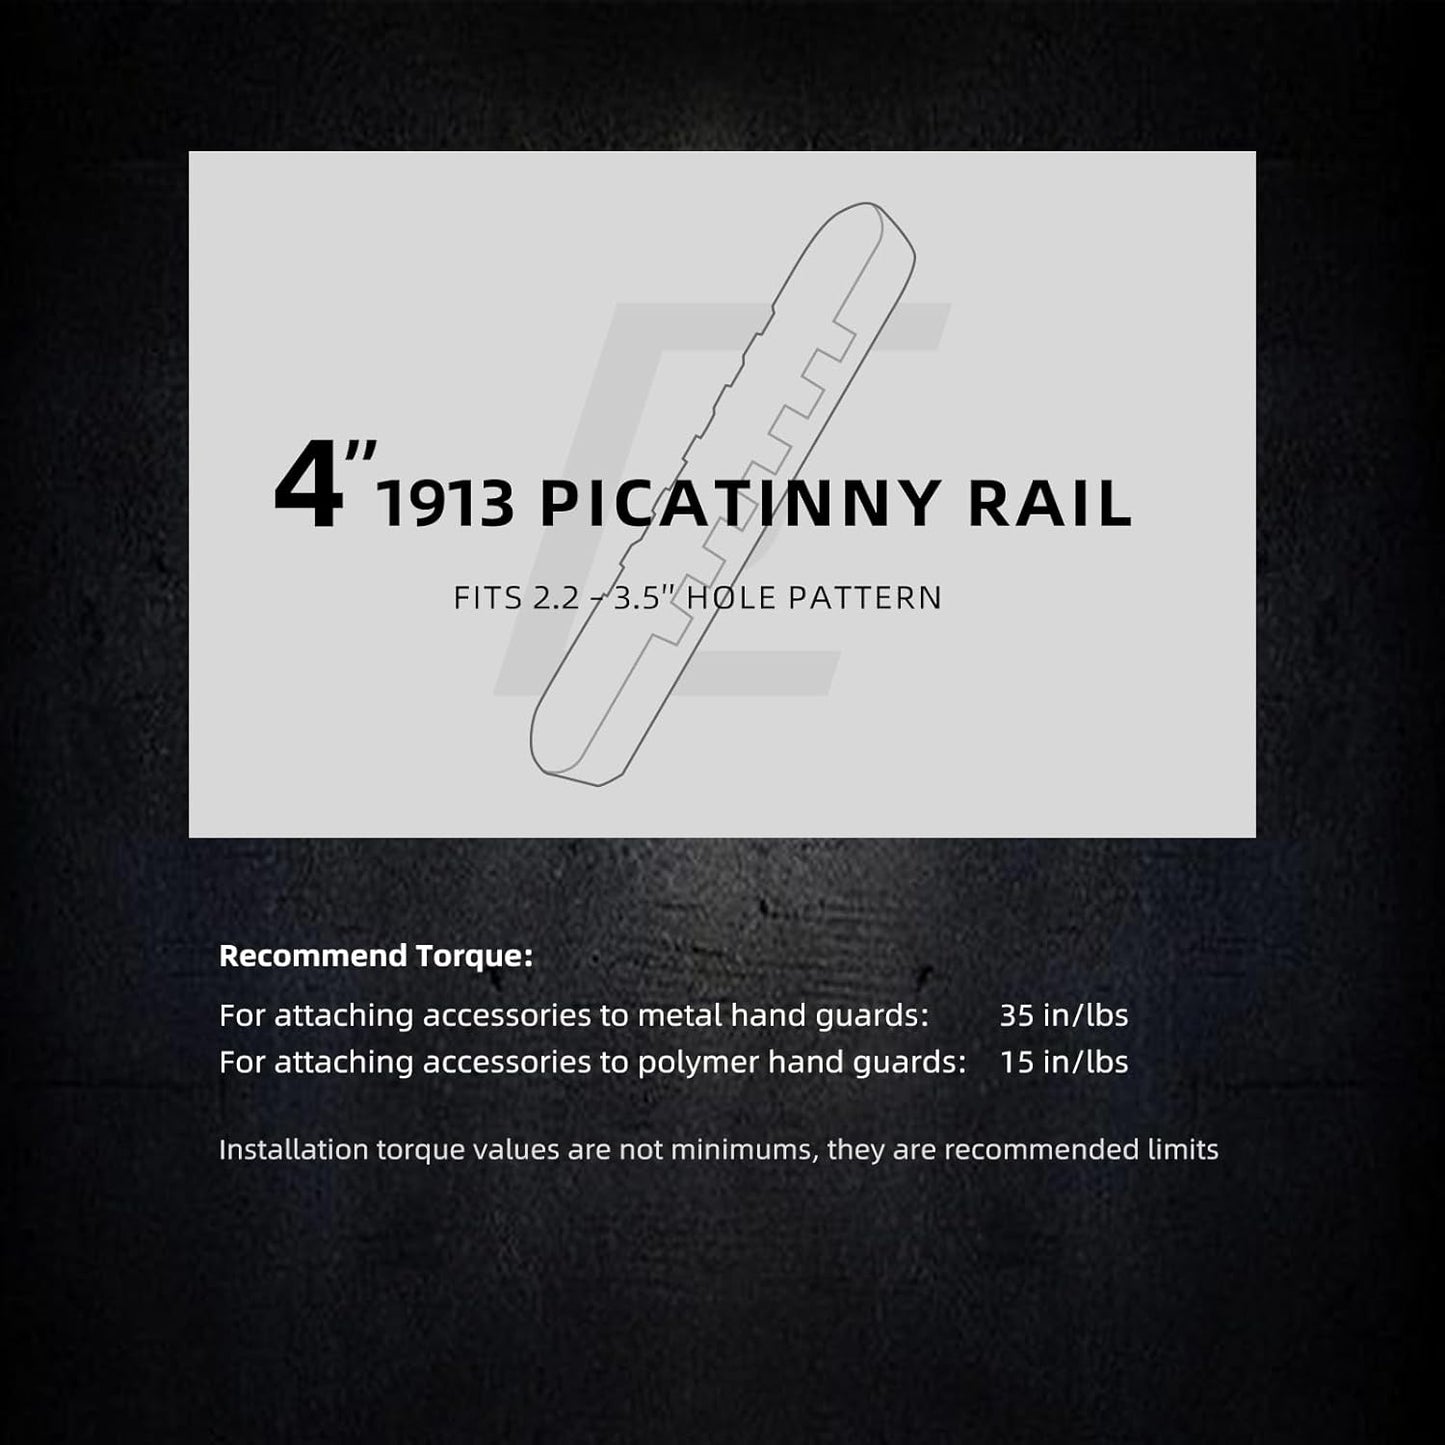
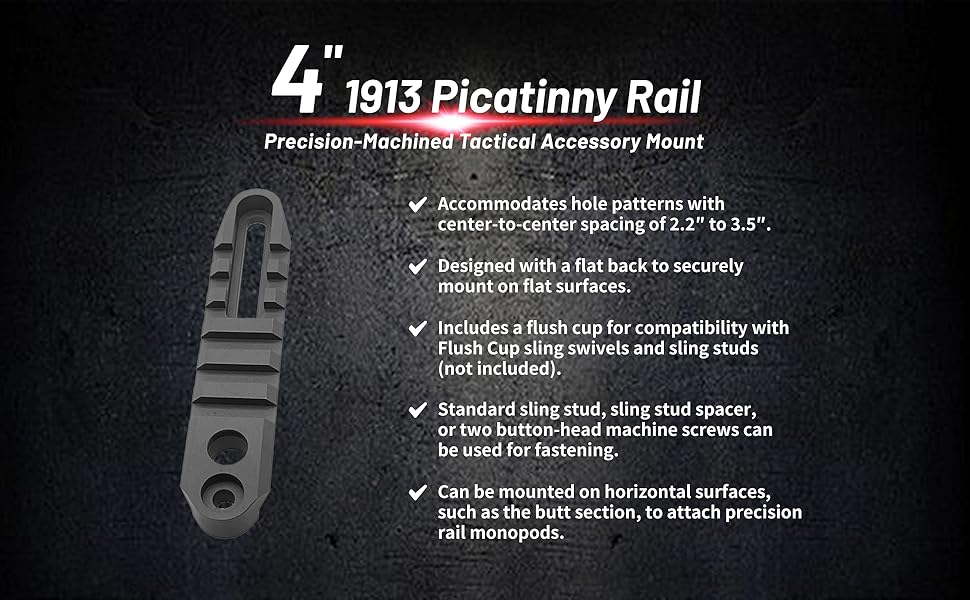
- 【Accurately Fit】This 1913 rails 3.35" and 4" flush cup fit for Atlas BT15 and BT17 bipods is a precision-machined tactical accessory mount with center-to-center spacing of 2.2" to 3.5". The product is designed with a flat back that can be safely mounted on a flat surface.
- 【Quality Materials】This 1913 rails fit for Atlas BT15 and BT17 bipods is machined from 6061-T6 aluminum with Mil-Spec Type III Class 2 finish, and is processed by a high-grade factory with trustworthy quality.
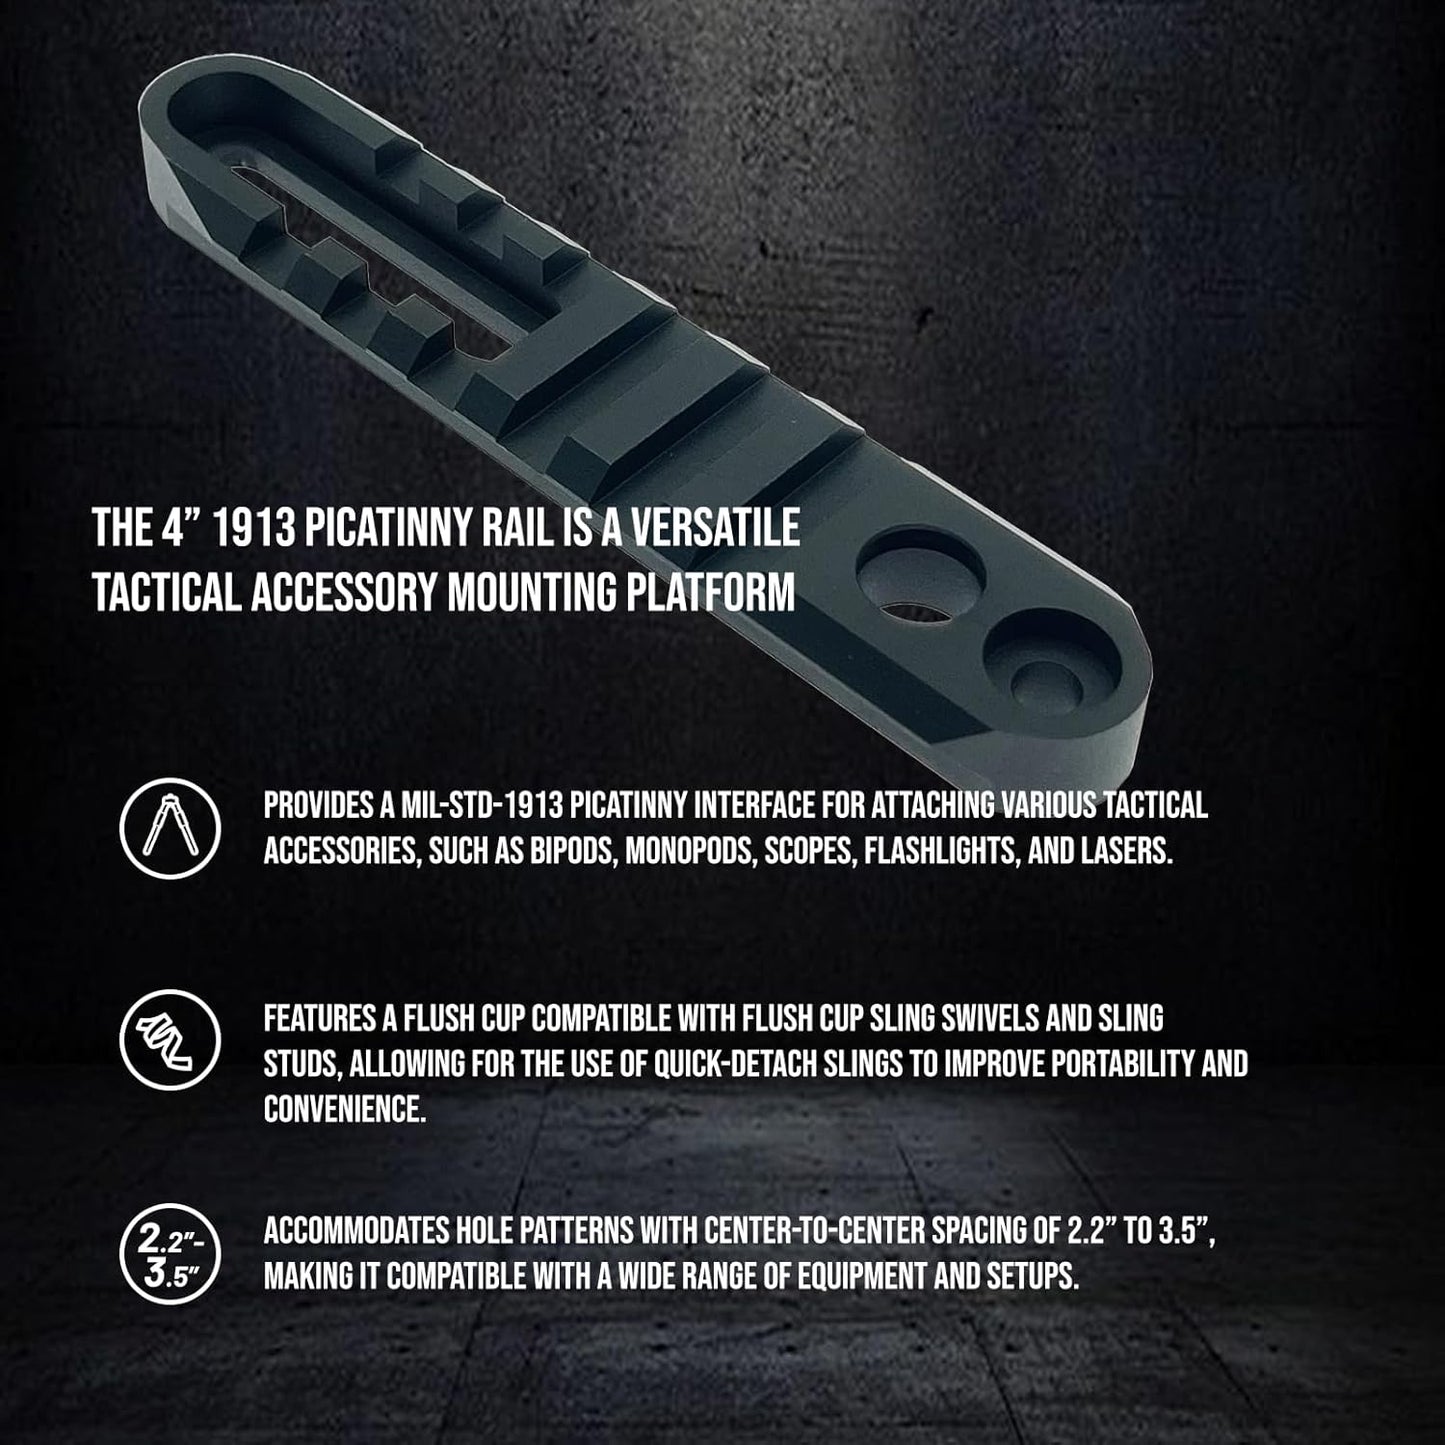
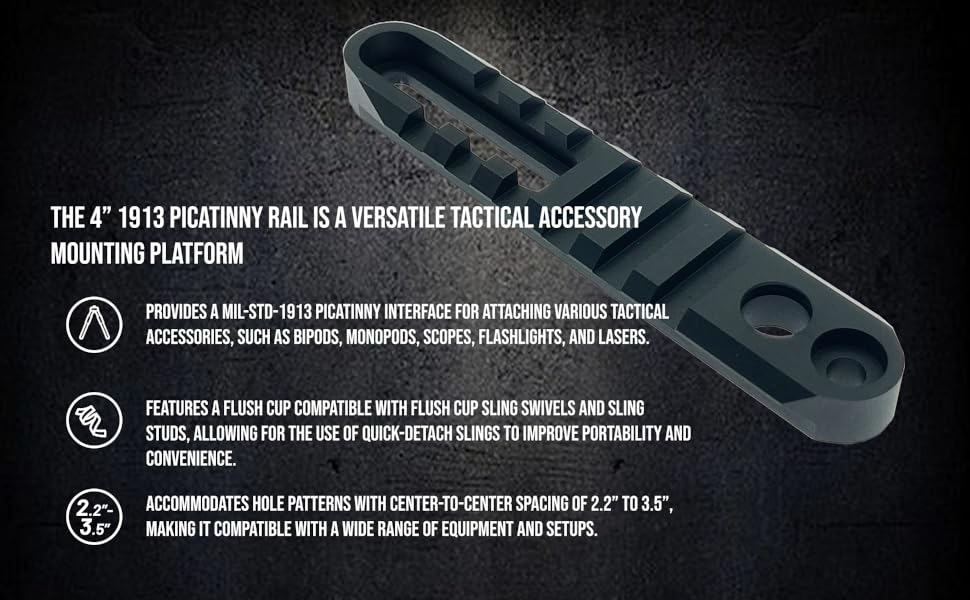
- 【Convenient Installation】The 4" 1913 picatinny rail includes a flush cup that is compatible with flush cup sling swivels and sling studs(not included) that can be secured using standard sling stud, sling stud spacer, or two button-head machine screws. It can also be attached to the horizontal surface on the butt section to attach BT12, BT13 or BT31 precision rail monopods. It has a flush cup for that style of sling swivels.
- 【Attachment】The 4" 1913 picatinny rail is a versatile tactical accessory mounting platform and provides a MIL-STD-1913 picatinny interface for attaching various tactical accessories, such as bipods, monopods. scopes, flashlights, and lasers. Features a flush cup compatible with flush cup sling swivels and sling studs, allowing for the use of quick-detach slings to improve portability and convenience. Accommodates hole patterns making it suitable for various configurations.
- 【Customer Service】If you encounter any problems during use, please contact us, your satisfaction is our goal. We will quickly solve your after-sales or usage problems to your satisfaction.
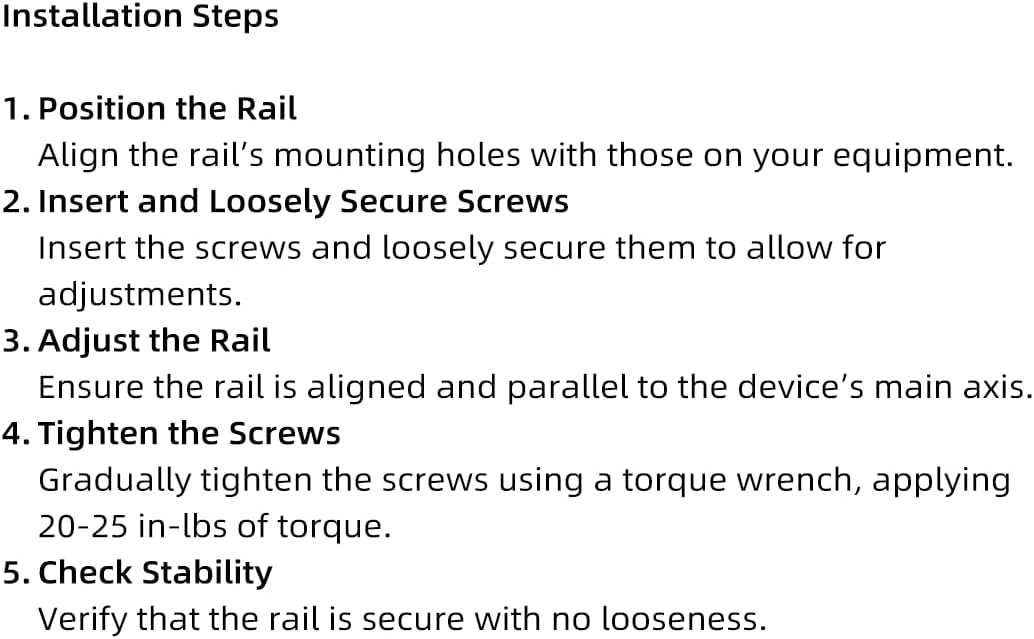
Installation Steps
1. Position the Rail
Align the rail’s mounting holes with those on your equipment.
2. Insert and Loosely Secure Screws
Insert the screws and loosely secure them to allow for adjustments.
3. Adjust the Rail
Ensure the rail is aligned and parallel to the device’s main axis.
4. Tighten the Screws
Gradually tighten the screws using a torque wrench, applying 20-25 in-lbs of torque.
5. Check Stability
Verify that the rail is secure with no looseness.